.svg)

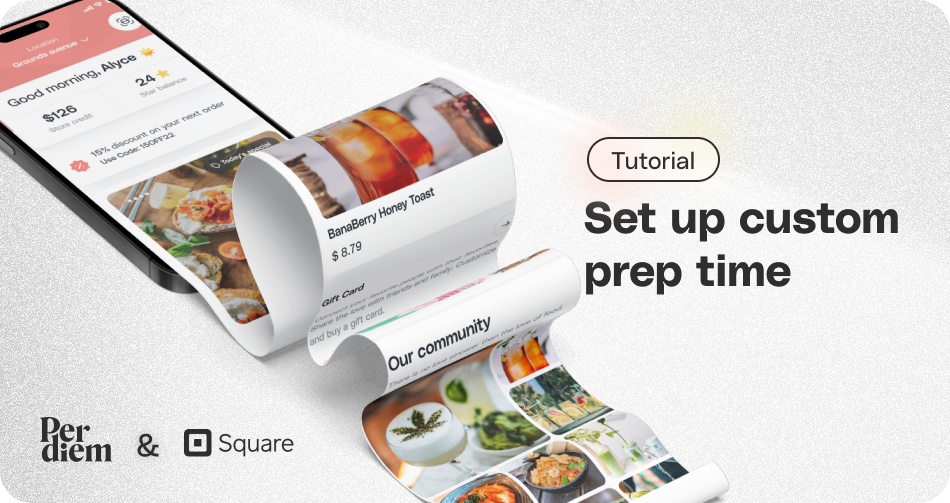
Set up custom prep times
Instructions
- Log in to your Per Diem merchant dashboard.
- From the operations dropdown tab on the left, select "Operational Times."
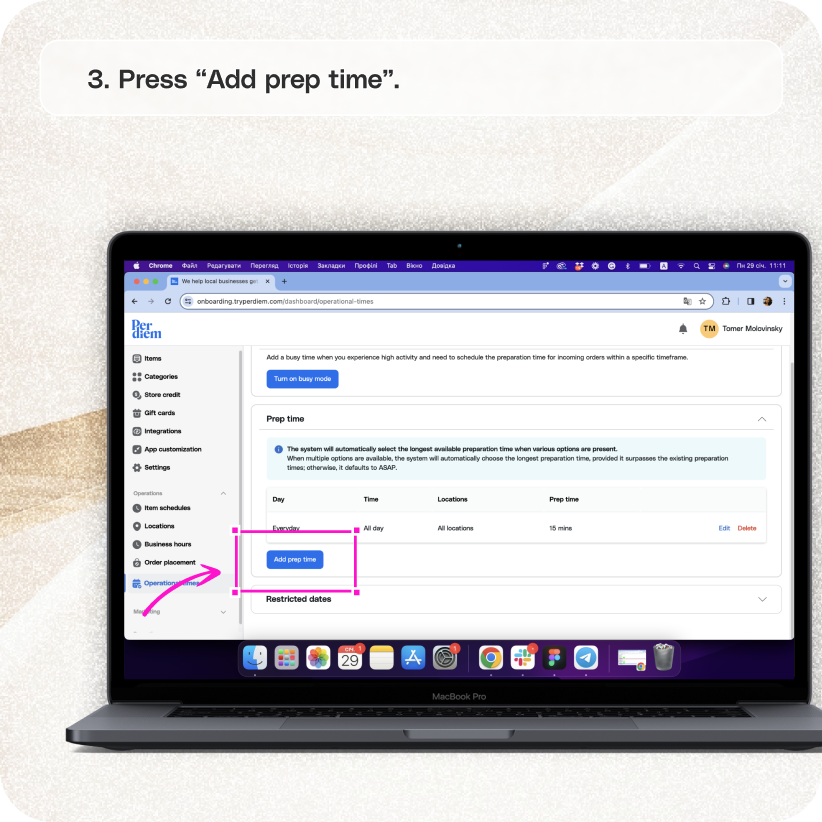
- In the second box below the busy mode, select "Add Prep Time."
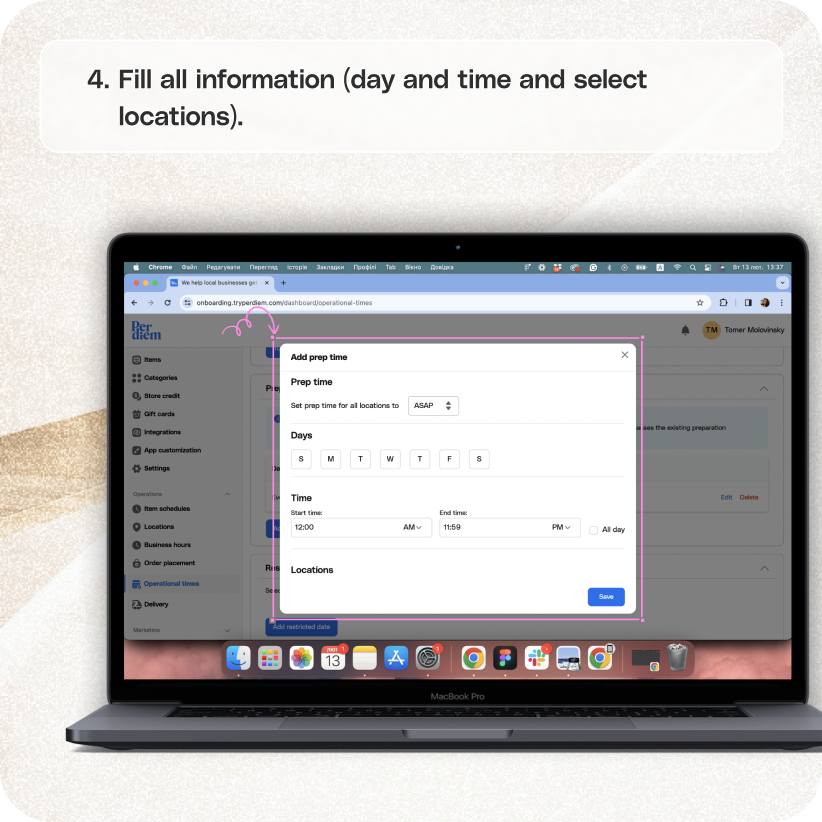
- Adjust your longest preparation time. The system will automatically choose the longest preparation time when multiple options are available, provided it surpasses existing preparation times; otherwise, it defaults to ASAP.
- Select days and times for your customized prep periods. You can also set it to "All Day" to minimize confusion.
- Choose the locations to which you want to add custom prep times, aligning with your business needs.
- Hit "Save" to update and save all your changes.
Still require support?
Contact support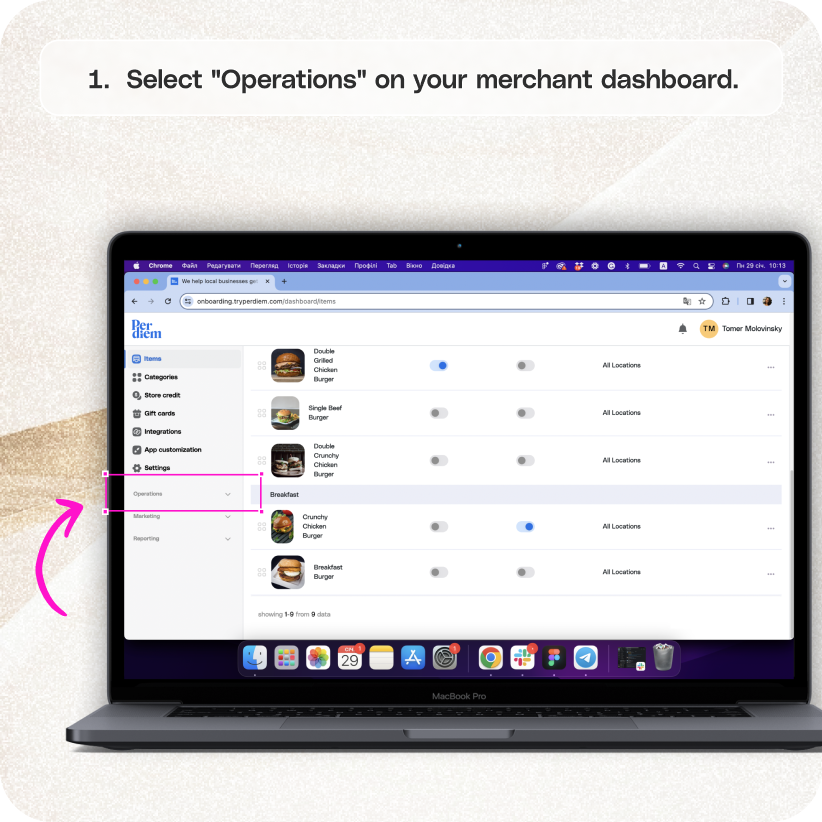

Log in to Your Merchant Dashboard
Ensure seamless operations by setting up prep times in your app. Here's a quick guide:
Step 1
Log in to your Per Diem merchant dashboard.
Select Operational Times
Optimize your order preparation with customized prep times:
Step 1
From the operations dropdown tab on the left, select "Operational Times."
Adjust Prep Time
Fine-tune your prep time settings for efficient order processing:
Step 1
In the second box below the busy mode, select "Add Prep Time."
Customize Your Prep Time
Tailor your prep time to match your business needs:
Step 1
Adjust your longest preparation time. The system will automatically choose the longest preparation time when multiple options are available, provided it surpasses existing preparation times; otherwise, it defaults to ASAP.

Select Day and Time
Streamline your prep schedule by specifying days and times:
Step 1
Select days and times for your customized prep periods. You can also set it to "All Day" to minimize confusion.
Choose Locations
Adapt your prep times based on location-specific requirements:
Step 1
Choose the locations to which you want to add custom prep times, aligning with your business needs.
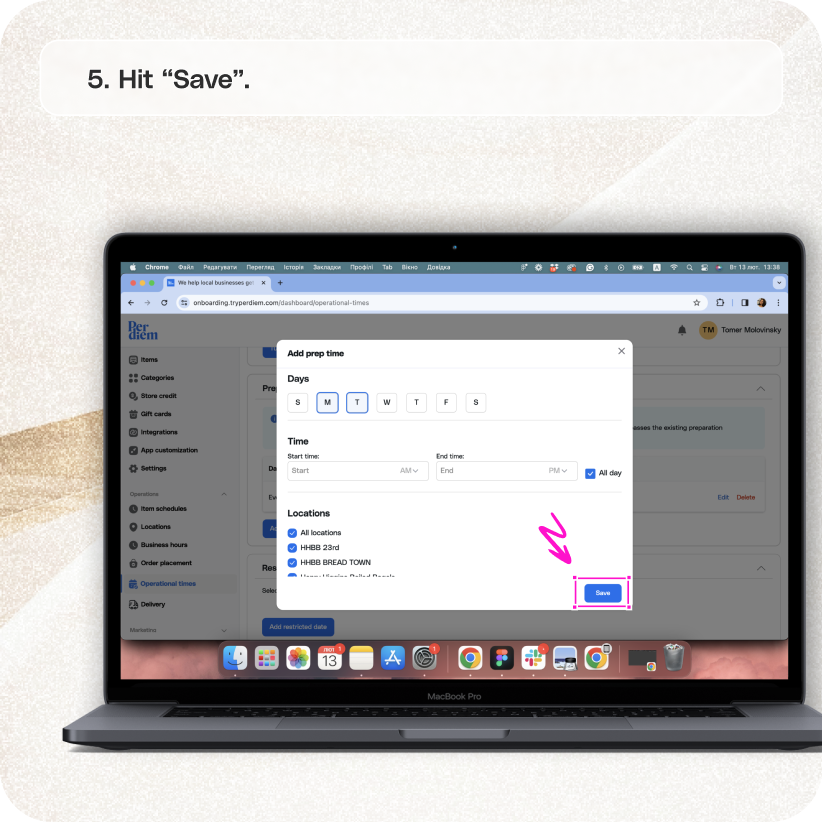
Hit Save
Ensure all changes are applied and saved for efficient order management:
Step 1
Hit "Save" to update and save all your changes.


.svg)


Still have questions?Contact us
Ask anything or just say hi